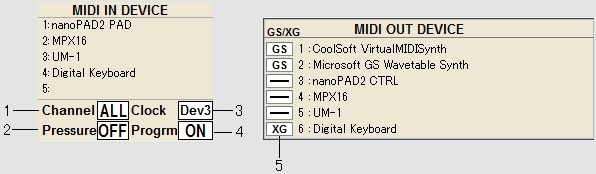
EXCLUSIVE data cannot be used.
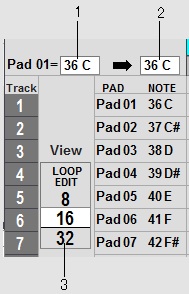
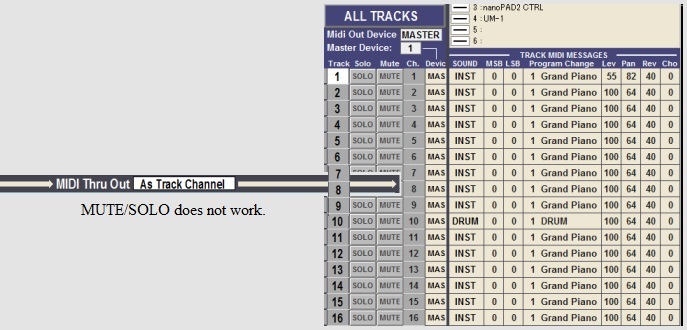
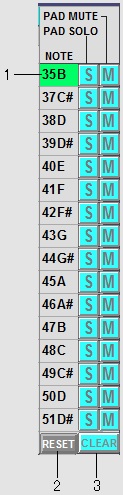
A track is to 1-16
Time signature of a sequence is only 4/4.
The sustain pedal information converts it into duration and makes
recording/playback.
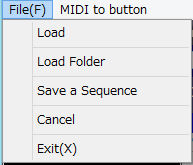
The file name can use only the alphabet. (Any file names other
than alphabet may not be read.)
| Note Value |
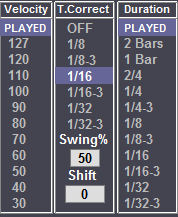
Please choose the value of timing correct.
OFF = NO timing correction,
1/8 = 1/8 note, 1/8(3) = 1/8 note triplets, 1/16 =1/16
note, 1/16(3) = 1/16 note triplets, 1/32 = 1/32 note, 1/32(3)
= 1/32 note triplets. |
| Strength% |
Strength controls how rigidly the events will be
quantized.
In other words, a 0% setting will not quantize the events
at all, whereas a 100% setting will cause every note to
snap perfectly into position within the beat.
Settings closer to 0% will allow note timing to be more
relaxed and true to the original performance,
while settings closer to 100% will make the events more
precise. |
| Shift Earlier |
In the shift timing field, set the amount of Shift
timing.
Set amount is shifts forwards. |
| Shift Later |
In the shift timing field, set the amount of Shift
timing.
Set amount is shifts back |
| Swing% |
You can set the swing value in the Swing% field.
With the swing feature, the even numbered events chosen
in the Note value field will be off the rhythm according
to the value in the Swing% field.
With this feature you can create the shuffle groove. |
Note
When OFF is chosen in the Note Value field, Strength and
Swing do not work.
Moreover, when 1/8-3, 1/16-3, and 1/32-3 are chosen,
Swing does not work. |
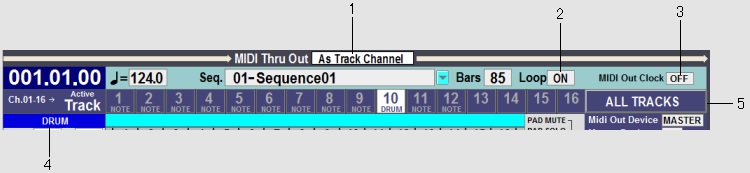
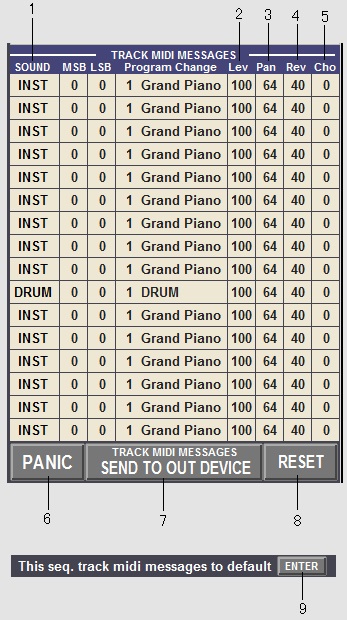
| 1 |
If this button is clicked, a marker will move to the
start of a sequence. Refer
to video. |
| 2 |
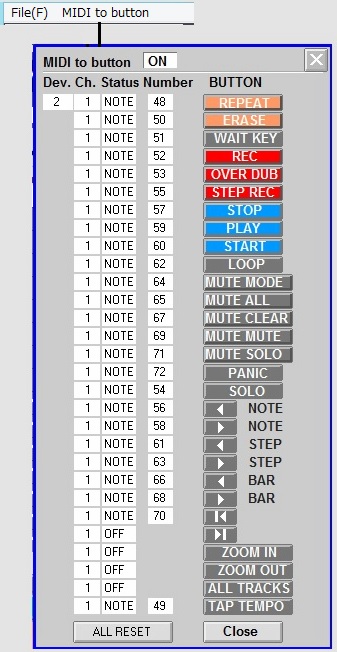
Recording can be started by receive of MIDI note. Refer
to video.
If this button is turned ON and "REC" or a
"OVER DUB" button is turned ON, it will be in
the standby state of recording.
Recording will be started if MIDI note is received in
this state.
Recording is started even if it receives the start signal
of a MIDI clock. |
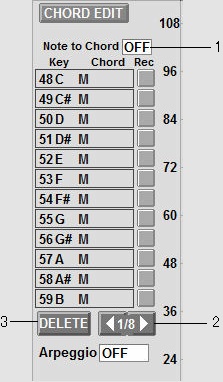
| 3 |
The track selected if this button is turned ON
becomes a solo. |
| 4 |
The marker will move by an event unit when click this
button. Refer to video. |
| 5 |
If this button is clicked, it will move marker
according to the value of the timing correct setting. Refer
to video. |
| 6 |
If this button is clicked, you can move marker by bar.
Refer to video. |
| 7 |
If this button is clicked, the number of the bars
displayed on a grid will be changed. (1-16) Refer
to video.
You can also be changed by turning the mouse wheel on the
button |
| 8 |
If this button is clicked, a marker will move to the
end of a sequence. Refer to video. |
| 9 |
When you want to enter an event with a mouse, please
turn ON this button. |
| 10 |
The tempo of a sequence will be set if this button is
clicked according to the tempo which you want to set. |
| 11 |
If it continues pressing the pad of a MIDI controller,
holding ON of this button, you can note repeat according
to the setting in timing correct. Refer
to video. |
| 12 |
This button will be displayed if the loop button is
ON. Refer to video.
If the pad of a MIDI controller is hit holding ON of this
button at the time of OVER DUB recording, all the events
of the hit pad will be erased. (Only the events within
the loop) |
| 13 |
If this button is turned ON, record to the sequence
of MIDI data will be started. |
| 14 |
If this button is turned ON, record to the sequence
of MIDI data will be started.
When there is a recorded event in the track, new events
is added to it. |
| 15 |
You can record an event with MIDI controller one by
one when turn on this button. |
| 16 |
If this button is clicked, playback/recording of a
sequence will stop. |
| 17 |
If this button is clicked, playback will be started
from the location of a marker. |
| 18 |
A click of this button will start reproduction from
the first of a sequence. |
| 19 |
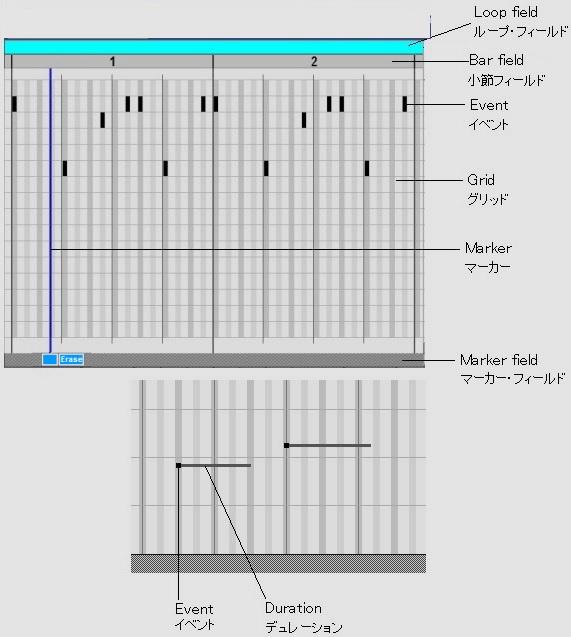
If this button is turned ON during a play, the loop
of the bars of a marker position will be carried out. Refer
to video.
The number of the bars which carry out a loop with the
loop bar of the loop field can be changed.
When the loop is set as two or more
bars, if ZOOM IN is performed, unloop automatically. |
| 20 |
When this button is ON, if this button is clicked, it
will return to the state before recording.
Or will return to the state it was in before the event is
erased. |
| 21 |
If this button is turned ON, an event list will be
displayed on the right-hand side of a screen. Refer
to video. |
| 22 |
If this button is turned ON, it will become track
mute mode. Refer to video.
You can mute/unmute tracks in real time during playback
by hitting the pads of a MIDI controller. |
| 23 |
A click of this button will mute all the tracks. |
| 24 |
A click of this button will unmute all the tracks. |
| 25 |
At the time of track mute mode, if this button is
turned ON, the pad of a MIDI controller can perform solo/unsolo
of the track corresponding to a pad. Refer
to video. |
| 26 |
At the time of track mute mode, if this button is
turned ON, the pad of a MIDI controller can perform mute/unmute
of the track corresponding to a pad. Refer
to video. |