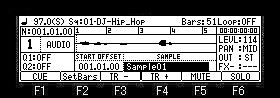
 If arbitrary trucks are chosen and Type is
chosen as "AUDIO" in the Type field, the truck can be
used as an audio track.
If arbitrary trucks are chosen and Type is
chosen as "AUDIO" in the Type field, the truck can be
used as an audio track.

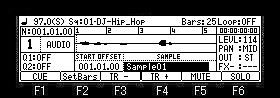
If AUDIO is select, the
track name to which question mark was attached will be displayed
on the "SAMPLE" field.
This is because the area of
the track name is used for the sample name of an audio track, and
is not a bug.
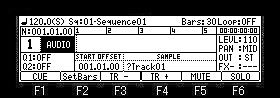
 Play of a sample
Please move cursor to the "SAMPLE" field and choose the
sample which you want to play back.
Playback of a sample will be begun if [PLAY] or the [PLAY START]
button is pressed.
When the [PLAY] button is pressed, playback can be begun from the
present time.
Playback will be stopped if the [STOP] button is pressed.
Note: In the case of a stereo
sample, only the wave of L channel is displayed.
If F2 (SetBars) button is pressed, the number of
the bars of the sample chosen will be calculated from the tempo
of the present sequence, and the length of a sample.
When the number of the bars of a sample is longer
than the number of the present bars, the number of the bars of a
sample is automatically set to the Bars field.

An TUNE, a FILTER, etc. are applicable to the
playback sound of a sample.
If you want to apply TUNE or a filter, set Q1 or Q2 in the slider
field.
The parameters that can be controlled with the sliders are as
follows
TUNE
LPF
BPF
HPF
Note
Q-Link does not work in an audio track.
Q1 of an audio track and Q2 are not Q-link, and they only mean a
slider.
Moreover, a slider does not work during recording.
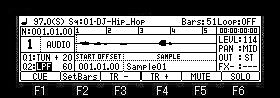
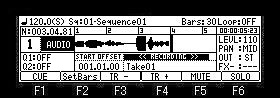
Start
offset of a sample
A sample can be started from arbitrary location.

Please move cursor to the START OFFSET field and
set the location which you want to start.
In the case of the above figure, if a sequence becomes a location
of 002.04.00, playback of a sample will start.
Preparing the recording
Move the cursor to the track type field and press the [WINDOW]
button to open the "Record setups" window.
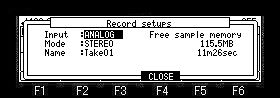
Please set each item as necessary.
Input field
Please choose the sauce to record.
Mode field
Please choose recording mode.
Name field
Please set the name of the recorded sample.
Free sample memory field
Free memory size and the time which can be recorded are displayed.
Starting the recording
When the [REC]+[PLAY START] key is pressed, recording is started
from 001.01.00.
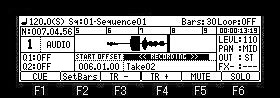
When the [REC]+[PLAY] button is pressed, recording is started
from the present location and the present location is set to
START OFFSET field.
If the [UNDU] button is
pressed after a stop, the sample recorded now will be canceled.
Notes
When the loop of a sequence is ON, recording is automatically
stopped at the end of a sequence.
When a loop is OFF, the recording will continue until you press
the [STOP] button.
And the number of the bar when you actually pressed the [STOP]
button will be set as the new length for the sequence.
[OVER DUB] button does not work.
Moreover, it cannot go to other screens during recording.
Audio track is can not convert in song mode. (Only the audio
track contained in the sequence of STEP 1 is converted)
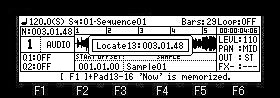
PAD LOCATE

Arbitrary locations are memorizable to pads. (PAD13-PAD16)
Please move a marker to the location to memorize, and press F1(CUE)+
PAD.
You can do this even during playback.
The present marker location is memorized to the pressed pad.
If f1(CUE)+PAD13 is pressed in the state of the above figure, the
present marker location will be memorized to PAD13.
If PAD13 is hit during playback, a marker will move to the
location memorized by the pad and playback will be continued from
the location.
If PAD13 is hit in the state of a stop, playback will be started
from the location memorized to PAD13.
The pads which can memorize a location is to PAD13-PAD16.
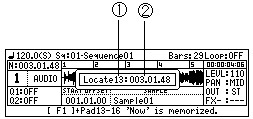
| 1 |
Pad number |
| 2 |
Memorized location |
Note
The function of PAD LOCATE does
not work during recording.
The function as shown in the following
figure is assigned to PAD1-PAD16.
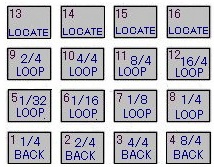
The loop of PAD5-PAD12 loop from the located where
the pad was pressed. (Refer to video)
It will also continue the loop while the pad is pressed.
Note
The loop of a sequence is
turned OFF if a pad loop is performed.