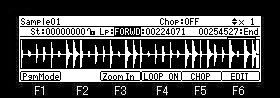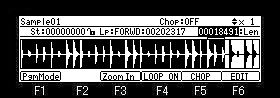
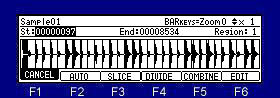
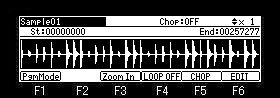
Stereo samples on the screen of CHOP will view the waveform of the left channel.
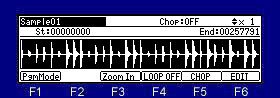
It will become chop mode if F5 (CHOP) button is pressed.
When cursor is in St field, the start point of a region can be adjusted.
When cursor is in St field, if the
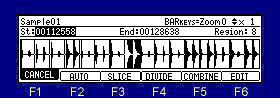
Please move cursor to the End field to adjust the end point of a region.
Level is expanded and displayed by
< BAR or [SHIFT] +
BAR > or [SHIFT] +
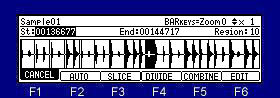
Selection of a region can be performed, if cursor is moved to the region field and a DATA wheel is turned.
The audition of the region chosen if arbitrary pads (PAD1-PAD12) are pushed can be performed.
Selection of a region can be performed, if cursor is moved to the region field and a DATA wheel is turned.
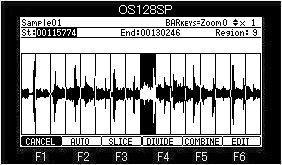
AUTO
If F2 (AUTO) button is pressed, the window of "Auto Slice" will open.
Note: The long sample for 20 seconds or more cannot AUTO.
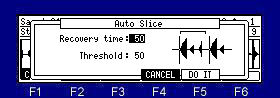
If AUTO is used, search of an attack will be performed automatically and it will be divided on the basis of the attack portion. (It divides into 64 at the maximum.)
Recovery time(10 - 100): This sets the minimum time between the attack and the next attack. (The attack within a time is ignore.)
Threshold(0 - 100): This sets the detectable level of an attack.
If a setup finishes, please press the F5 (DO IT) button.
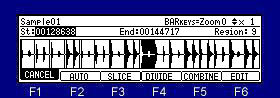
SLICE
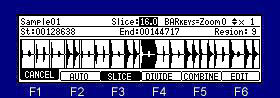
If F3 (SLICE) button is pressed, it becomes slice mode and the number of regions can be changed. (2-64)
If a DATA wheel is turned holding [TAP TEMPO] or the [SHIFT] button, the quantity of change will increase 10 times.
Slice mode will be canceled, if F3 (SLICE) button is pressed once again or the
DIVIDE
The region chosen if F4 (DIVIDE) button is pressed is divided into two.
COMBINE
The region chosen if F5 (COMBINE) button is pressed, and an adjoining region are combined.
When cursor is in St field, it combines with the region by the side of a start (left),
and when it is in the End field, it combines with the region by the side of End (right).

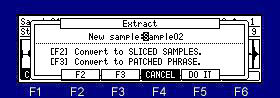
EDIT
If F6 (EDIT) button is pressed, the window of "Extract" will open.

Notes
99 or more extracts cannot be performed from the same sample.
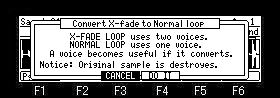
It becomes a mono sample when the sample of a stereo is converted into Patched Phrase.
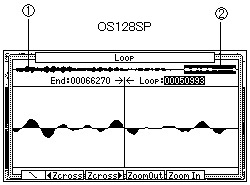
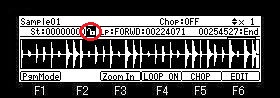
Please press F4 (LOOP OFF) button and make it LOOP ON.
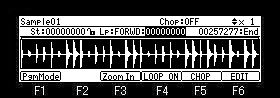
Adjustment of a loop point

Please move cursor to the Loop field and turn a DATA wheel.
If a DATA wheel is turned holding [TAP TEMPO] or the [SHIFT] button, the quantity of change will increase 10 times.
If Q1 [AFTER] button is ON (the LED is lit), loop point can be adjusted with a Q1 slider.
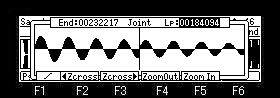
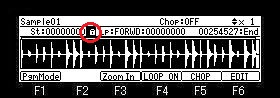
Adjustment of an end point
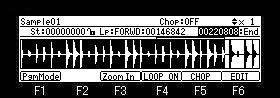
Please move cursor to the End field and turn a DATA wheel.
If a DATA wheel is turned holding [TAP TEMPO] or the [SHIFT] button, the quantity of change will increase 10 times.
If Q2 [AFTER] button is ON (the LED is lit), end point can be adjusted with a Q2 slider.
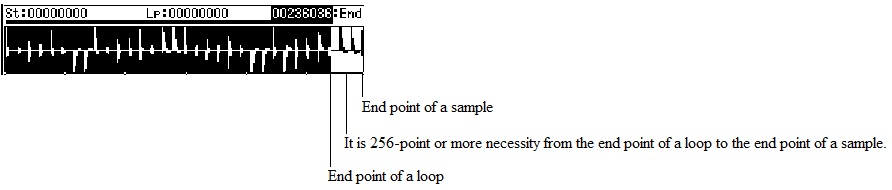
Note
It is required 256 points or more between the end point of a loop, and the end point of a sample.
When the end point of a sample is the same as the end point of a loop, a noise arises.
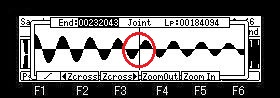
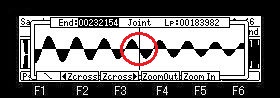
If the [WINDOW] button is pressed when a loop is ON, the window of "Joint" will open.

The left of screen is an end point and the right is a loop point.
Please turn and adjust a DATA wheel.
Level is expanded and displayed by